|

|
Now we have come to my favourite
part of my work! If you build a face up in 3D you can be really creative!
With foam latex, gelatin or silicone you are free to create just about
anything. You start off by making a cast of
the actor with a material called alginate. It is the same material that
dentists use to cast teeth.
The very first thing you do when making a
life cast is to prepare the actor for what they are about to experience. I
usually show them a finished life cast and a sample of cured alginate. I
think it is extremely important to make the actor feel as comfortable as
possible and then hopefully they won't feel claustrophobic. I usually don't
have any problems with actors freaking out because I have explained the
process in detail. |
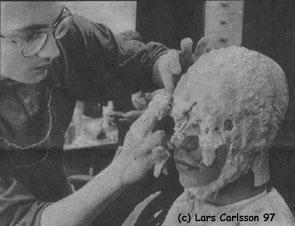
The technique I use when casting is
very simple. I just smear the cold alginate over the actors face, always
making sure his nostrils are free so he can breath. When the alginate
has hardened it is time to put a couple of layers of plaster bandages on
top of it. This will make it stable when you later remove it from the
face.
I usually put some of salt in the hot water I dip the plaster
bandages in. This accelerates the hardening process.
It's very
important that you make sure that the mould will come loose easy. If
you cast the whole head the plaster mould must be made in two halves
(or more depending on the moulds shape). When everything is dry you
carefully remove the mould and it's time to fill it with plaster. |

Here I am smearing alginate over the actor Patrick Bergners face during
the preparations of a show at the Angereds Theatre, Folkkungasagan.
|

|
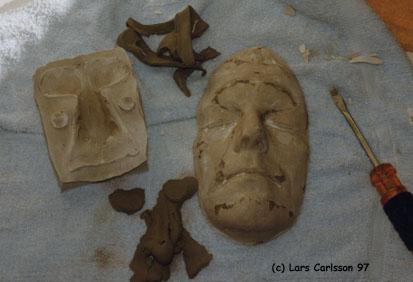
Then you fill the mould with
dental plaster (no plaster of Paris, it's too weak) mouldano and Ultracal
30 are both good brands. I always put in some kind of handle in the back
for easier handling later on. When all of this is ready it is time to
decide how the rubber piece should look.
This is done by sculpting
it on top of the finished plaster cast with Roma Plastelina or Chavant
clay. |
When you're happy
with the look of your sculpture you must build walls and overflow
streams that keeps the next plaster layer from dripping all over the
place.
Then you can build a 3-4 cm thick plaster layer on top of the
sculpture. For strength I always reinforce it with hemp or burlap. When
the plaster has hardened and if you are lucky it will be easy to
separate them.
If not, start over!
Now it is time to fill your moulds with foam
latex or any other soft material like gelatin or silicone. The making
of foam latex is sadly quite a difficult process that often fails. Due
to this many stop trying.
I promise that when you succeed you
will feel it was well worth the effort. |

|
|
If I should try to describe the feeling of
a good piece of foam latex it is very difficult. It is silky smooth and
in my opinion almost sensual. It is extremely elastic which makes it
follow the actors own skin perfectly once it's glued on.
Both
gelatin and silicone are both great too as they reassemble the
translucency and feel of real skin.
|
On this picture I
have glued a piece to the temple and ear of Tomas von Brömsen.
Unfortunately this makeup didn't make it into the movie "Juloratoriet"
because of time reasons.
To glue on a piece like this takes about 2 hours
and after that you must touch it up throughout the day.
Other bigger
makeup's can take as long as 4-5 hours to put on.
So you have to get
up early in the morning when you are working on a film.
For a more in depth look on how to make your own makeup appliances you
should read my 6 page course on how I made Dr
Miracle. |
 |